ACCOUNT

BASKET

0333 444 5644
07935 321 720

CONTACT

ACCOUNT

BASKET

0333 444 5644
07935 321 720

CONTACT

ACCOUNT

BASKET

, , , , , , , , , , ,

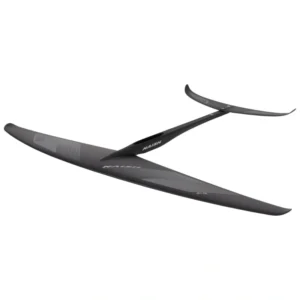
RRD Universal Flying Fish Foil Y30

Price range: £653.00 through £1,971.00

Get in touch if there is a configuration you’d like not shown

The new RRD Flying Fish sets a new benchmark for high-aspect front foils. It delivers an exceptional blend of glide, high-speed stability, precise control through turns, all while maintaining impressive low-speed lift.

Every aspect of its design—from section shape and outline, the lenght of the fuselage and the carbon adj flowarch rear wing is fine-tuned by our riders to ensure not just high performance, but an unmatched level of fun and maneuverability.

Whether you’re into surf, wing, or downwind foiling, the Flying Fish is a foil that truly excels in every discipline.

Features

  • Dynamic pitch control
  • Superior turning ability
  • Effortless glide and precision

Front wing only – comes with foil cover
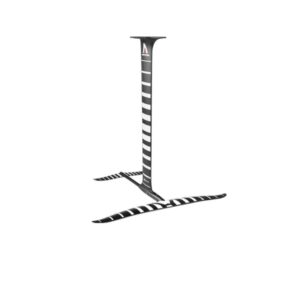
Full plane + mast – comes with the recommended stabiliser, recommended fuselage and mast, plus hardware and kit bag

Full Plane

As recommended by RRD.

Delivery & Costs

We currently only deliver to the UK. Please contact us for international sales and delivery options.

We aim to send your order within 1-2 working days of it being placed (subject to payment authorisation and stock availability). All quoted delivery times are based on standard working days (Mon-Fri) and excludes public holidays.

Orders under £100 – £4.99 (Standard UK delivery*)
Orders over £100 – FREE

*Prices will vary for delivery to UK islands and Northern Ireland.

See our Delivery Terms for more information.

How to Install Your RSPro Rail Savers

Dry Installation — Recommended Method

Dry install is the go-to method recommended. It’s fast, clean, and if done correctly, guarantees a long-lasting result.

Dry Installation – YouTube

Wet Installation — A Great Option for Some Users

While we usually suggest the dry method, there are a few cases where wet installation can be a better fit—especially for beginners or boards with delicate coatings.

Wet Installation – YouTube 

Let’s break them down step-by-step below.

How to Install RSPro Rail Savers — Dry Method

Best for: Most users, most boards.

Conditions: Do it in a warm space (above 20ºC / 68ºF). Ideally above 25ºC / 77ºF.

Dry Method Steps:

1. Warm things up

If the room is cold, gently warm the rail savers using a hairdryer or heat gun. Warmth makes the material more flexible and the adhesive more effective.

2. Unroll and align

Place both bands loosely along each rail of your board to visualize placement.

3. Mark the center

Use a pencil to mark the center of each band and the center of the board rail.

4. Dry-fit the band

Without peeling the backing yet, align the center of the rail protector with your center mark on the board. Stretch it gently toward the nose and mark the starting point.

5. Peel and stick

Begin peeling the backing from the front end of the rail saver. Press it down at your starting mark, sticking it along the outer edge of the board (this is where most impacts occur).

6. Follow the rail

Keep the band aligned with the rail edge as you press down gradually along the length of the board. Use your hands, the integrated carton squeegee in the packaging or a soft cloth to apply pressure and remove any air bubbles.

7. Final heat (optional)

For best adhesion, go over the installed rail savers with gentle heat once more and press firmly.

When to Use Wet Installation Instead

Best for: Fragile paint jobs, ultra-expensive or ultra-cheap boards, nervous first-timers, cold conditions. 

Conditions: Ideal when you want more control over placement

What you’ll need: Clean water in a spray bottle, a soft squeegee or credit card, and patience.

Wet Method Steps:

1. Spray lightly

Mist clean water directly onto the rail of your board. Don’t soak it—just a light layer will do.

2. Place the band

Peel the backing and apply the rail saver to the wet surface. The moisture allows you to slide and reposition it without committing right away.

3. Adjust placement

Once you’re happy with the positioning, hold it in place and start removing the water underneath using a soft squeegee or similar tool.

4. Let it dry

Leave the board in a warm, dry place. Any leftover water will evaporate within a few hours.

⚠️ Note: Avoid using harsh soaps or surfactants in the water—just clean water is enough.

How to service your Lift Efoil Motor

Lip Seals and Oil Change

These instructions will walk you through the replacement of the two Lip seals and perform your own oil change.

Note: It will be easier to perform these repairs with the mast removed.

Step 1
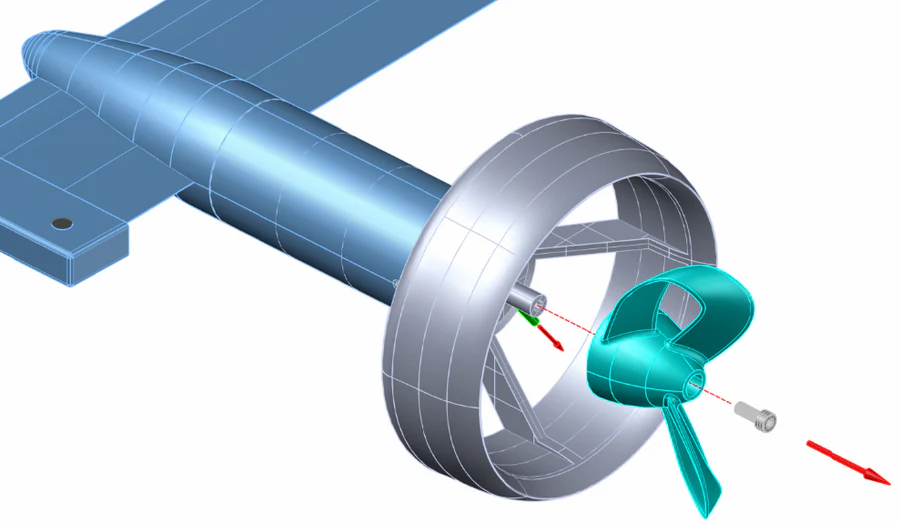
If the Lift LCS is installed, remove the prop. For a conventional prop, remove the center bolt, then pull out the propeller and pin (the pin may fall out, make sure not to lose it). If the propeller is jammed, you may try to: a. lightly tap on it, b. soak it in water for about an hour, or, c. use a prop remover.


Step 2

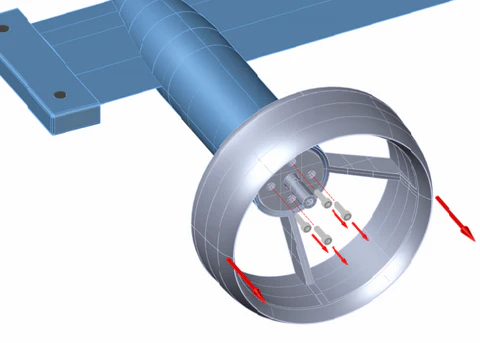
Remove the four screws that connect the LCS base or shroud to the motor casing.  Slide out the LCS base or shroud.  Four replacement screws are provided.  Use NEW/provided Allen Wrenches to remove the screws.

EFS Oil change kit 5 

Step 3
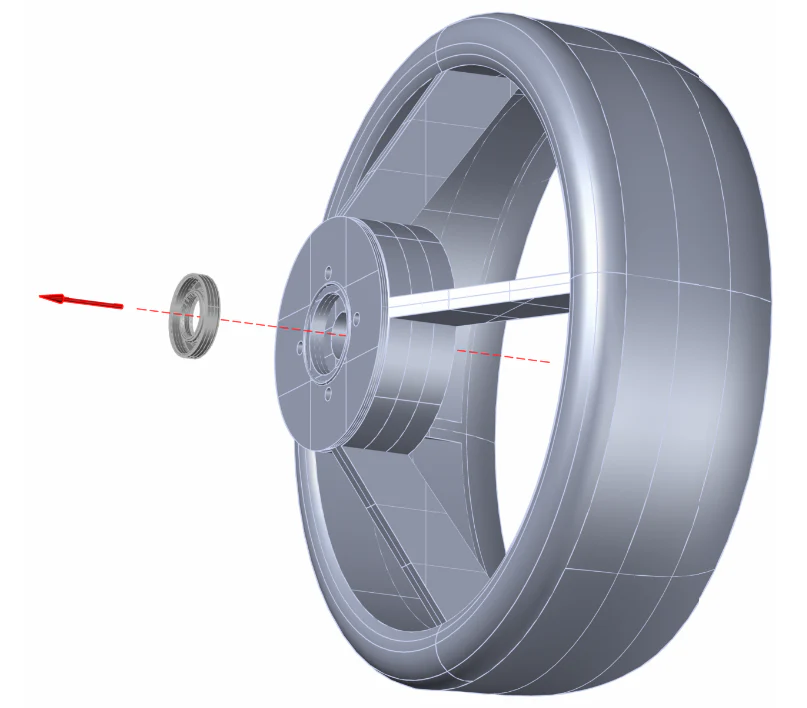
Remove the Rotary Seal from the shroud or LCS base.  Use a sharp object is required.  Replace with provided Lip Seal, open side facing motor.

EFS Oil change kit 3 

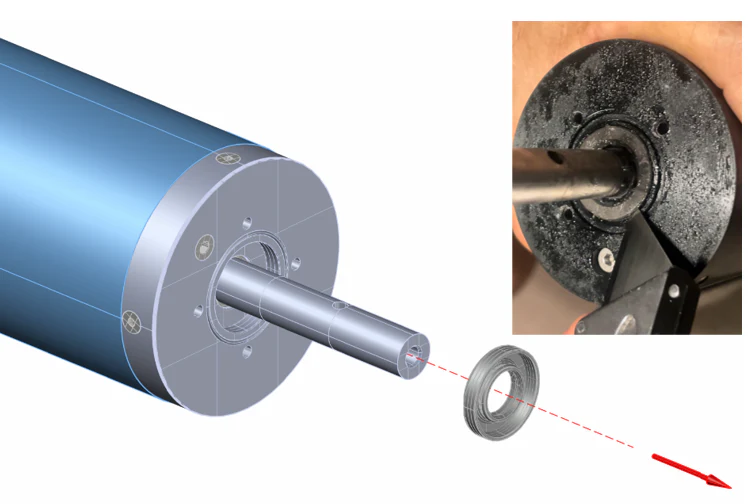
Step 4
Use a sharp object to remove Lip Seal from motor.  Remove and replace the compression O-Ring.

EFS Oil change kit 4 

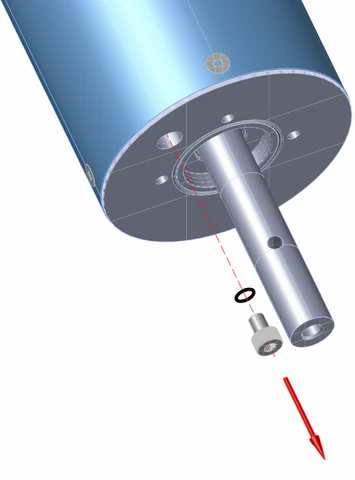
Step 5
Remove the drain fill screw and replace the O Ring.  Tilt the motor with the screw hole facing downward. Without the seal and screw, the oil should drain easily; While the drain hole faces down, twist and rotate the motor housing in a circular motion to help the oil accumulate at the opening. If the oil appears very milky, clean it using brake cleaner. Use the straw attachment on the brake cleaner can to spray up the drain hole and help flush out any contaminants.

EFS Oil change kit 8

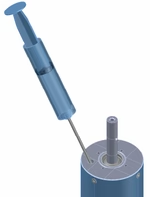
Step 6
Tilt the motor with the drain hole facing up.  Install the second Rotary Seal provided, open side facing prop.  Use syringe and thick needle provided to add oil to the motor.  You may need to use most or all of the oil.  The oil bottle provided contains slightly.  DO NOT OVERFILL.  If the oil reaches the top, remove about 5-10 ml using the syringe.

EFS Oil change kit 1

Step 7

Reassemble in reverse order.
 

Safe Use of the Efoil Solutions Propellers

FAILURE TO COMPLY WITH THESE WARNINGS MAY RESULT IN SERIOUS INJURIES.

  • Use of this Propeller and the sport of E-foiling involve inherent risks of injury or death. By using this product, you accept the risk of its use.  
  • The Efoil Solutions propellers are for advanced Efoil users only and some may be used without the manufacturer propeller guard.  Use added caution. 
  • Contact with rotating propeller may cause serious injury or death.  While the propeller is spinning, KEEP AWAY.
  • Turn off the remote and disconnect the battery from the Efoil before handling the propeller.
  • Always inspect the product before use.
  • Never ride at speeds that exceed your abilities.
  • Always wear protective gear.
  • Avoid wearing loose clothes that may get entangled with the propeller.
  • Never allow inexperienced riders to operate this product without proper training.
  • Do not allow children to operate this product.

EFOIL SOLUTIONS Size Guide

EFS Man Size
We're out for a break! Please send us a message and we'll get back to you shortly.
Next shipping date for all orders is
03 January 2025
Happy 2025!

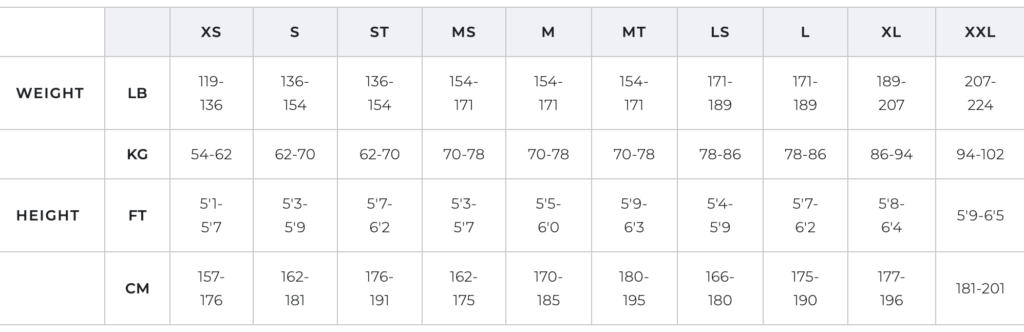
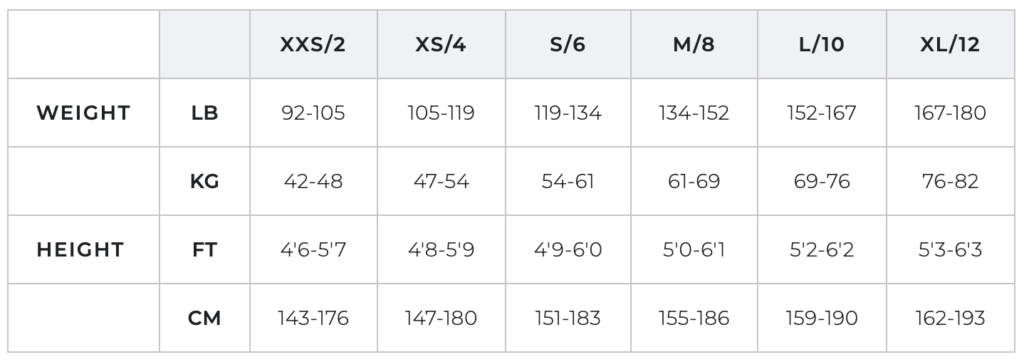
MANERA Size Guide

Wetsuits - Men

Manera mens wetsuit size guide

Wetsuits - Women

Manera womens wetsuit size guide

Enter RYA Show competition

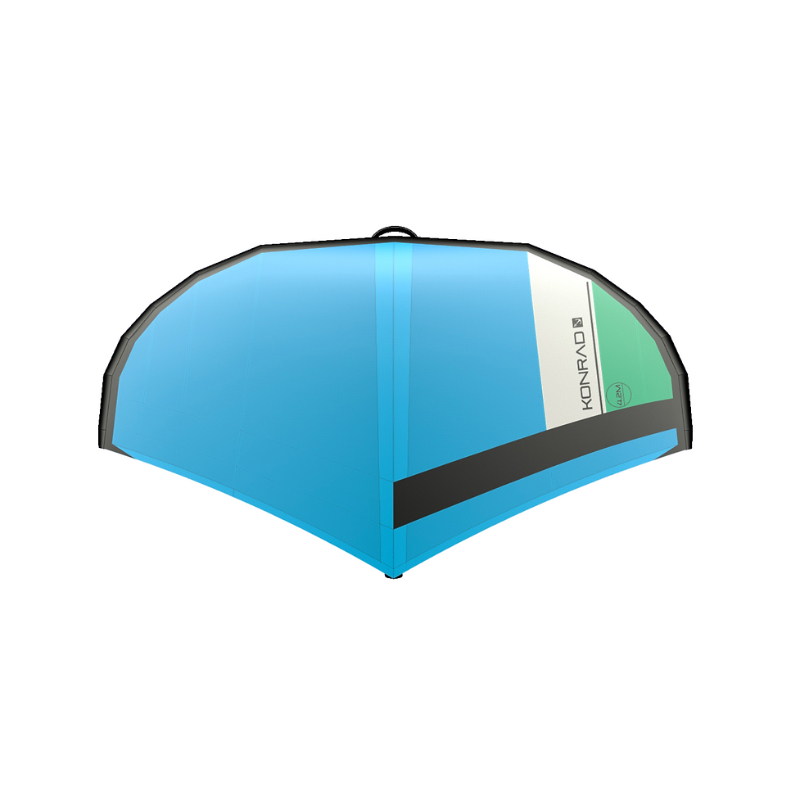
Konrad wingman V4

1st prize!

KONRAD Wingman V4 - 5 metre wing

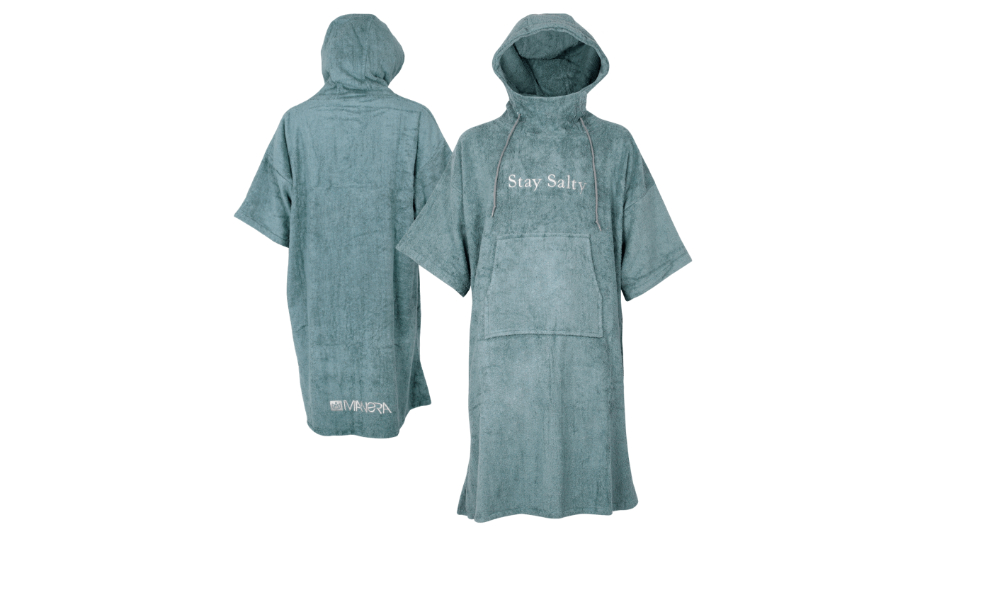
manera winter poncho steel

2nd prize

MANERA Poncho

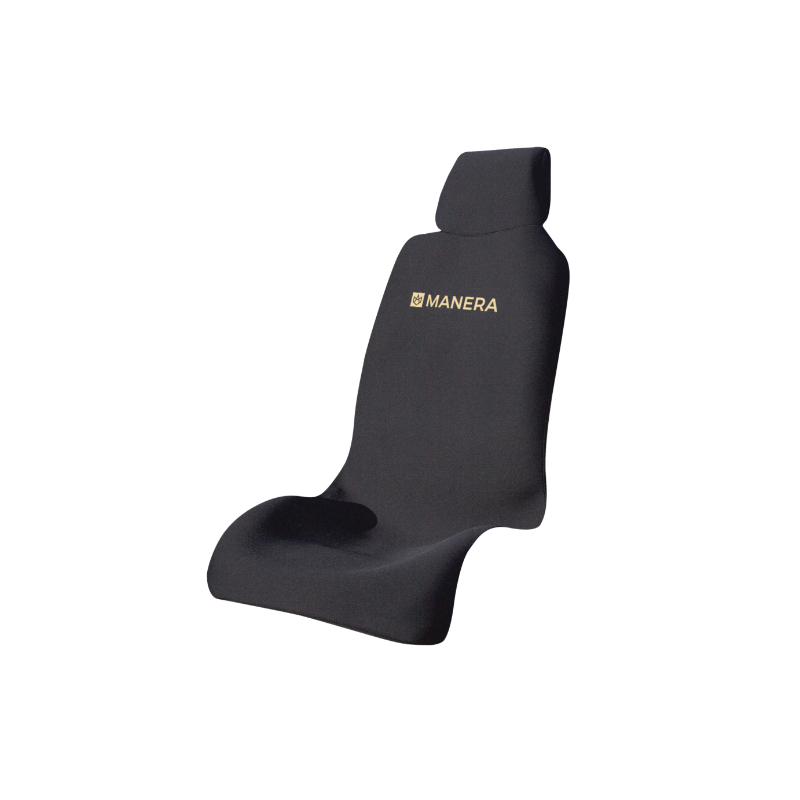
manera car seat cover

3rd prize

MANERA Car Seat Cover

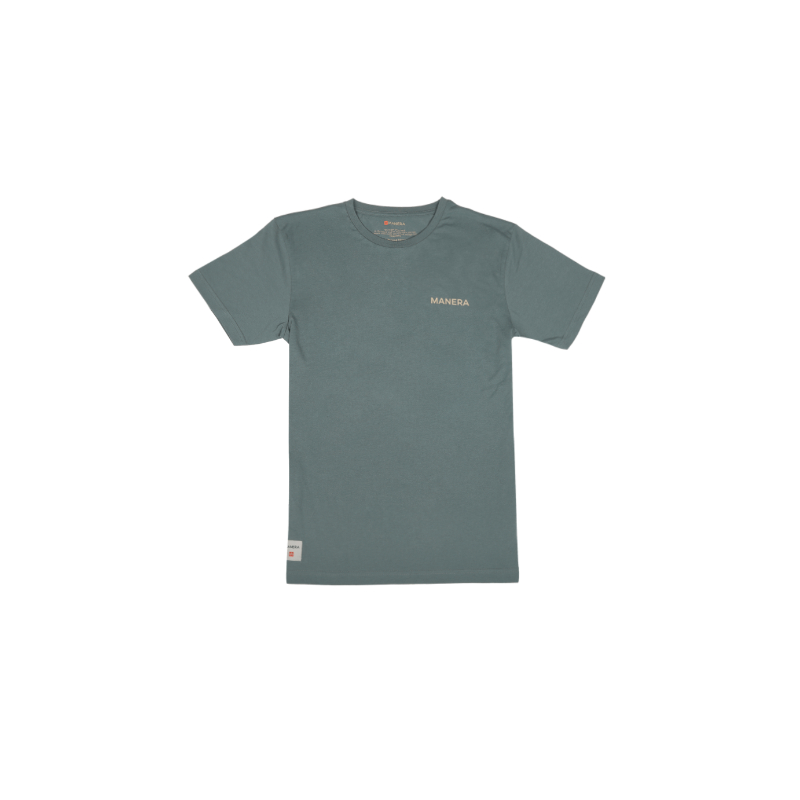
manera tee

4th prize

MANERA Tee

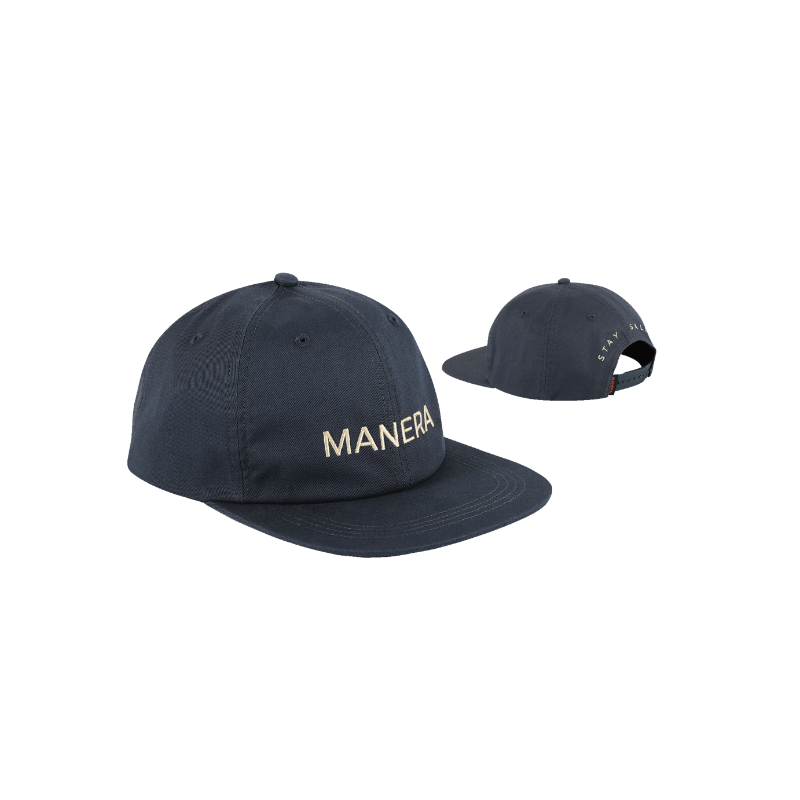
manera cap

5th prize

MANERA Cap

Step 1. Sign up to our newsletter

Step 2. Follow us on social

Competition Terms

  1. This competition is for attendees of the RYA Dinghy & Watersports Show only.
  2. Closing date is Wednesday 1st March 2023 at 11.59pm and winners will be picked, at random, the following day starting with the first prize through to the fifth.
  3. Providing all criteria is fulfilled, the winners will be notified by email who must respond within 14 days in order to claim the prize.
  4. Delivery to UK addresses only.
  5. All entrants must be aged 18 and over.
  6. No cash alternatives given.
  7. Winners names and social identity may be used for publicity purposes on TFC social channels and marketing material.
onewheel logo
 ONEWHEEL PintONEWHEEL Pint XONEWHEEL GT
Top Speed:26kmh / 16mph29kmh / 18mph32kph / 20mph
Range:6-8 miles12-18 miles20-32 miles
Charge Time:80-120 minutes110-225 minutes200 minutes (90 min with GT Hypercharger)
Battery:NMC Lithium-ionNMC Lithium-ionNMC Lithium-ion
Weight:10.5kg12.2kg15.8kg
App:Provides live speed, battery life, mileage, ride style, community features and diagnostics
Brakes:Regenerative BrakingRegenerative BrakingRegenerative Braking
Motor:750W Hypercore Hub Motor750W Hypercore Hub Motor750W Hypercore Hub Brushless Motor
Tyre:10.5in x 6.5-6in Vega10.5in x 4.5-6in Onewheel11.5in x 6.5-6.5in Onewheel
Remote Control:No Remote – Lean and goNo Remote – Lean and goNo Remote – Lean and go
Lighting:LED strip for battery status and in-ride alertsLED strip for battery status and in-ride alertsIntelligent LED Lights – White Front and Red Rear
Sensors:Solid state MEMS 6-DOFSolid state MEMS 6-DOFSolid State MEMS 6-DOF
Size:

8.75 x 10.5 x 27 inches
(222 x 266 x 689 mm)

8.75 x 10.5 x 27 inches
(222 x 266 x 689 mm)
9.5 x 11.5 x 29 inches
(241 x 292 x 737 mm)

Winter Lesson Request

Please send us your lesson request and we’ll reply to you as soon as possible.

Hover Wing Foil Board Size

Below is a rough guide to help determine Hover Wing Foil board size based on rider weight and skill level. A “beginner” rider is considered as someone with no previous board sport experience.

Keep in mind that additional factors, such as wind conditions, foil, and kite wing size will play an important role in the selection of the right board size.

As a rule of thumb, we recommend erring on the side of a more buoyant board with a volume that matches rider weight (for example, an 80kg rider will need at least an 80L board or larger). Riding a “sinker” will work in locations with steady, strong winds, while floatier boards prove to be a safer choice as they allow the rider to get back to shore even if the wind drops under a foilable limit.

40 L:
Not recommended for beginners or intermediate
Up to 70 kg for advanced/highly skilled riders

50 L:
Not recommended for beginners or intermediate riders
Up 75 kg for advanced/highly skilled riders

60 L:
Not recommended for beginners
Intermediate riders up to 45 kg
Advanced and highly skilled riders up to 85 kg

75 L:
Not recommended for beginners
Intermediate riders up to 55 kg
Advanced riders up to 90 kg

85 L:
For beginners up to 50 kg
Intermediate riders up to 70 kg
Advanced riders up to 100 kg

95 L:
For beginners up to 60 kg
Intermediate riders up to 80 kg
Advanced riders up to 105 kg

110 L:
For beginners up to 80 kg
Intermediate riders up to 95 kg
Advanced riders up to 115 kg

125 L:
For beginners up to 95 kg
Intermediate riders up to 105 kg
Advanced riders up to 130 kg

140 L:
For beginners up to 115 kg
Intermediate riders up to 125 kg
Advanced riders up to 160 kg